A pool that drops water faster than the weather can explain usually gets your attention fast. For most homeowners, the question is simple: is this normal evaporation, or is money slipping out through a leak? These pool leak detection steps for homeowners help you sort that out before a small issue turns into a repair that affects your water bill, pool finish, or equipment.
Some water loss is expected. Heat, wind, direct sun, and heavy pool use all move water out of the pool. But a leak behaves differently. The level keeps falling in a pattern, you find soggy spots near the pool, or the auto-fill seems to run more than it should. The goal is not to diagnose every hidden plumbing failure on your own. It is to narrow the problem down with a calm, useful process.
Start with what normal water loss looks like
Most residential pools lose some water to evaporation each week. In hot weather, a pool can lose around a quarter-inch to a half-inch over several days, sometimes more if the pool is exposed and windy. That means a small drop does not automatically point to a leak.
What matters is consistency. If you are adding water every few days, or the level keeps dropping to the same spot, that is when leak detection becomes worth your time. Homeowners often notice this first at the skimmer. The water line looks slightly lower than usual, then lower again, even when the weather has been mild.
Before testing anything, turn off water features for a day if you can. Sheer descents, fountains, spillovers, and attached spas increase evaporation and can mask what is really happening. A still pool gives you a cleaner reading.
The bucket test is the first step
If you only do one thing, do the bucket test. It is the clearest way to compare normal evaporation with actual water loss.
Fill a bucket with pool water and place it on a pool step so the bucket sits partly submerged but does not float away. Mark the water level inside the bucket and mark the pool water level on the outside of the bucket. Let the system run normally for 24 hours.
After a day, compare the two marks. If the pool water has dropped more than the water inside the bucket, the pool is likely losing water somewhere beyond evaporation. If both levels dropped by about the same amount, you are probably dealing with environmental loss rather than a leak.
You can repeat the same test with the pump off for another 24 hours. That second round matters. If the pool loses more water with the pump on, the leak may be in the pressure side plumbing, return lines, or equipment pad. If it loses more with the pump off, the issue may be in the shell, fittings, suction lines, or somewhere below the normal waterline.
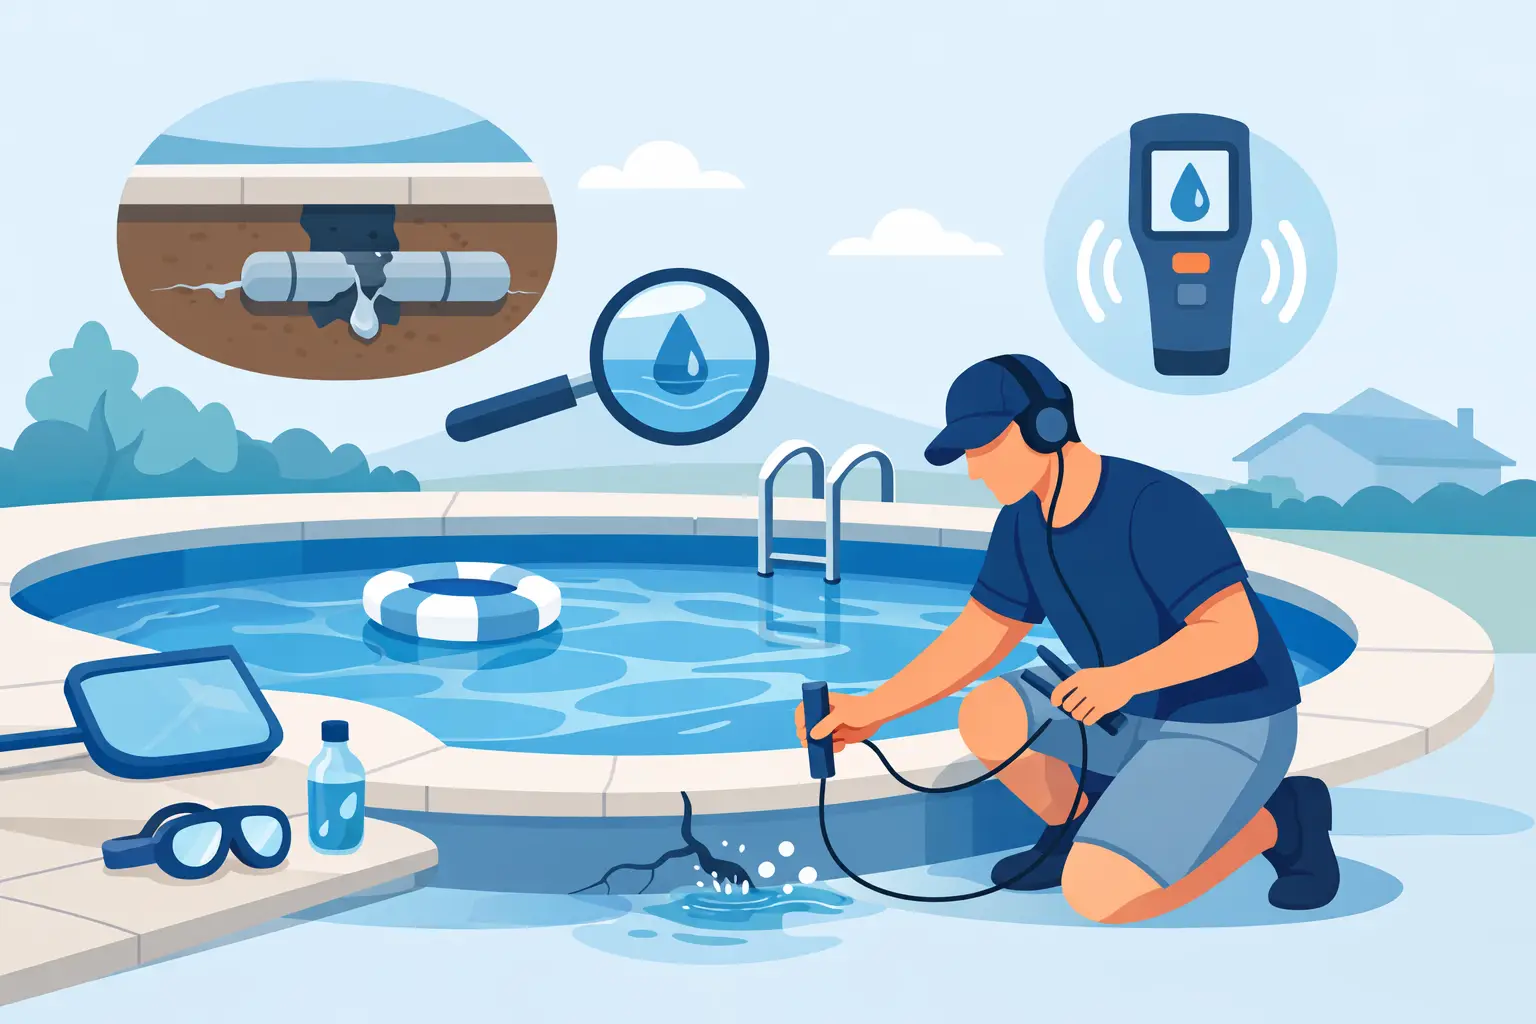
Check around the equipment pad
Once the bucket test suggests a leak, the next move is simple observation. Start at the equipment pad because it is accessible and often overlooked.
Look for damp soil, dripping valves, loose unions, or water collecting under the pump, filter, or heater. A slow drip at the pad may not seem dramatic, but over time it adds up. Inspect the pump lid O-ring, filter tank clamp area, backwash valve, and any visible plumbing joints.
This is also where trade-offs matter. Some moisture around equipment can come from condensation or routine filter cleaning. That is different from active leaking. If the area stays wet when the system is running, or you hear air getting pulled into the pump while water drips elsewhere, that is a stronger sign of a plumbing issue.
Inspect the pool edge, skimmer, and fittings
Many residential leaks happen at common stress points where materials meet. The skimmer throat is one of the first places to inspect. Look closely for cracks where the plastic skimmer meets the pool structure. Small separation lines can widen over time with shifting ground or seasonal movement.
Then check return fittings, light niches, vacuum ports, and any visible penetrations through the pool wall. These points handle movement, pressure, and age differently than the rest of the shell. If a pool has tile, coping, or decking with visible cracking nearby, pay attention to those areas too.
A leak does not always show itself as flowing water. Sometimes the clue is subtle – loose tile, softened soil, algae growth in one odd area, or a stain line that keeps changing. If the water level repeatedly stops at the same height, inspect everything that sits at that level. Pools often leak at the point where the water stops dropping.
Watch what happens when the water level falls
This is one of the most useful pool leak detection steps for homeowners because it costs nothing and narrows the search quickly. Let the water level fall naturally, but do not let it drop low enough to damage equipment if your skimmer will run dry.
If the water stops falling at the bottom of the skimmer opening, the skimmer area becomes the likely suspect. If it settles at the level of a light or return fitting, inspect that component first. If the pool keeps losing water well below the skimmer, the leak may be lower in the shell or in plumbing that is affected regardless of water height.
Vinyl, fiberglass, and concrete pools can all leak, but they do it differently. Vinyl liners may show punctures or seam issues. Fiberglass pools may leak around fittings or plumbing penetrations. Concrete pools can develop cracks, especially around structural transitions. The test process is similar, but the repair path depends on the pool type.
Use dye carefully for suspected cracks
If you find a spot that looks suspicious, a dye test can help confirm whether water is moving out through it. With the pump off and the water still, release a small amount of leak detection dye or food coloring near the crack, fitting, or gap. If the dye pulls into the area, that suggests water is escaping there.
This works best on visible, reachable spots. It does not help much with underground plumbing or unclear structural issues. It also requires patience. If the water is moving from wind or circulation, the result can be misleading.
For homeowners, dye testing is useful as a confirmation tool, not a full diagnosis. If you find one leak point, there could still be another. Older pools sometimes have more than one problem working at the same time.
Don’t ignore the yard around the pool
Leaks do not always announce themselves inside the pool. Walk the perimeter and the path to the equipment area. Soft ground, standing water, eroded soil, or unusually green grass can all point to underground water loss. If there is a retaining wall, nearby slope, or patio section that looks like it is shifting, pay attention.
This is where small delays can become expensive. Water under decking can wash out support, create voids, or lead to cracking over time. A pool is part of a larger outdoor space, and leak damage does not stay neatly contained.
Know when it is time to call a professional
Homeowners can rule out evaporation, inspect visible components, and identify patterns. That is often enough to decide whether the issue is minor or worth a service call. If the bucket test confirms water loss and you cannot find an obvious source, it is time for professional leak detection.
That is especially true if you suspect underground plumbing, pressure-side line damage, structural cracking, or leaks near electrical components like lights. Specialized testing uses pressure tools, listening equipment, and methods that go beyond visual inspection. It is faster, and usually cheaper, than guessing your way into the wrong repair.
Coastal Cove Pools works with homeowners who want clear answers before a leak affects the full pool experience. That matters because the cost of waiting is rarely just water. It can mean finish damage, deck movement, equipment strain, and a backyard that stops feeling easy to own.
A practical routine going forward
After the repair, keep a simple baseline. Know where your normal water level sits. Glance at your equipment pad once a week. Pay attention to refill frequency during stable weather. If your pool has an auto-fill, make a point of checking it, because auto-fill systems can hide leaks for months by constantly replacing lost water.
A well-kept pool should feel predictable. When the water level starts behaving differently, that is your signal to act early. A short test now is better than a major repair later, and the sooner you narrow it down, the sooner your backyard gets back to what it should be – clean, calm, and ready when you are.